It’s fairly easy to produce output files using ansible, with one of my favourite methods being to use a Jinja template to output a file with comma separated values (CSV) and then converting that to Excel (XLSX) format. But where should that file get stored?
If you’re running Ansible on your local machine and the file is just for your use, dropping the file in a folder on your machine is a valid option. That’s no good if you want to share the file with others, and it’s useless if you’re running AWX or Ansible Tower since when the Execution Environment is terminated, the file dies with it.
One option is to SCP the file to a remote server and have users connect to that file share to retrieve it. But a better option for O365 users might be to upload the file to a SharePoint Online site where it has version control, can be accessed by users from a web browser, or potentially even used with a PowerApp.
If you’re a user of Microsoft 365 services, you may already know that the best way to integrate a system with 365 is with GraphAPI. If you’re not at all familiar with GraphAPI, I recommend signing up for a free Microsoft 365 Developer account which will allow you to test API calls without risking your corporate environment.
Let’s get started!
Log in to your Azure Portal and open up Entra ID (formerly Azure AD). In the left menu click “App Registrations”
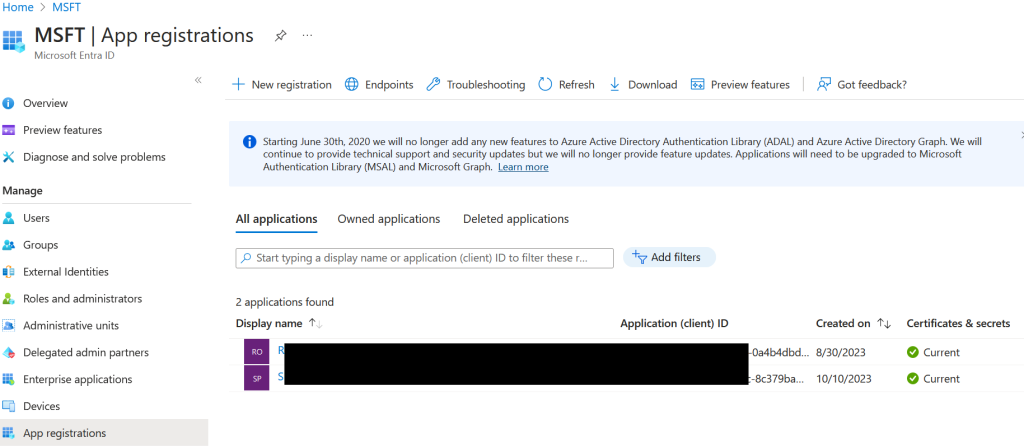
From here, click “New registration”. Give your application a name, leave the account types and redirect settings as they are, and click “Register.” This will give you the IDs necessary to connect to GraphAPI. Record these values.
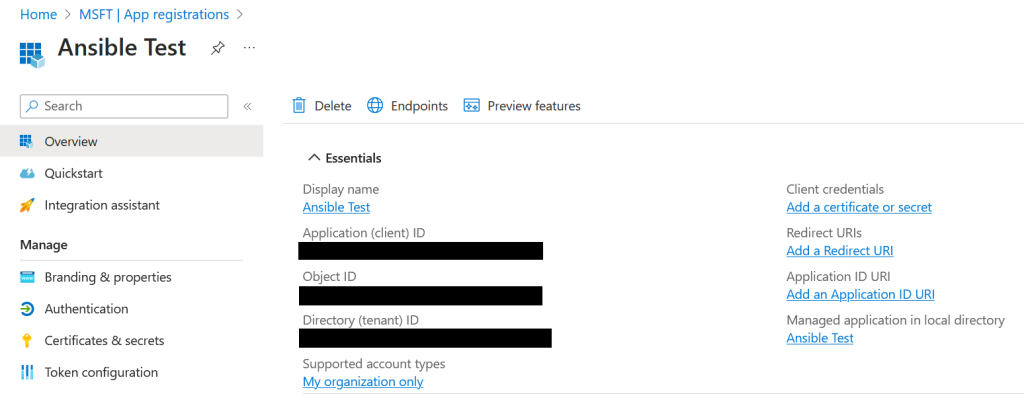
You’ll need to generate a client secret, so click the link “Add a certificate or secret”, then under the Client Secrets tab click “New client secret.” Add a description and your desired expiry time, then click “Add” to confirm your choices. Make sure you save the Value! It can only be viewed this once.

Now it’s time to add permissions to the application. Select “API permissions” from the left menu. You’ll likely have a default User.Read permission already so remove this. Click “Add a permission” and then “Microsoft Graph.”
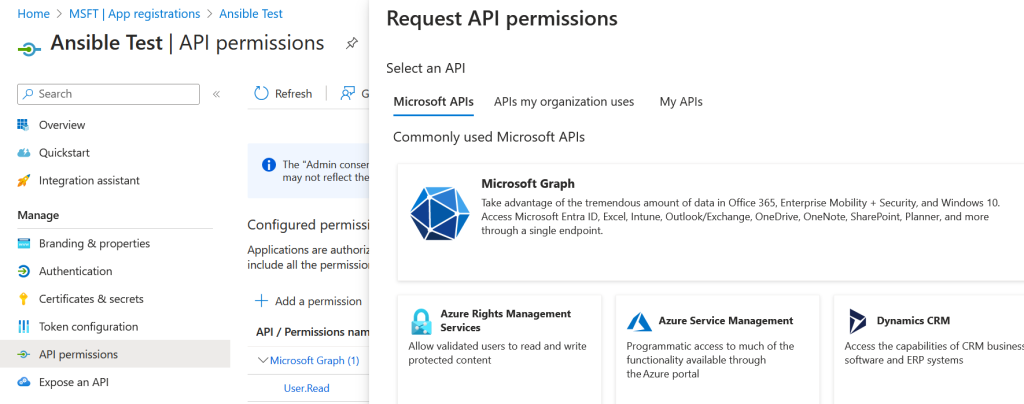
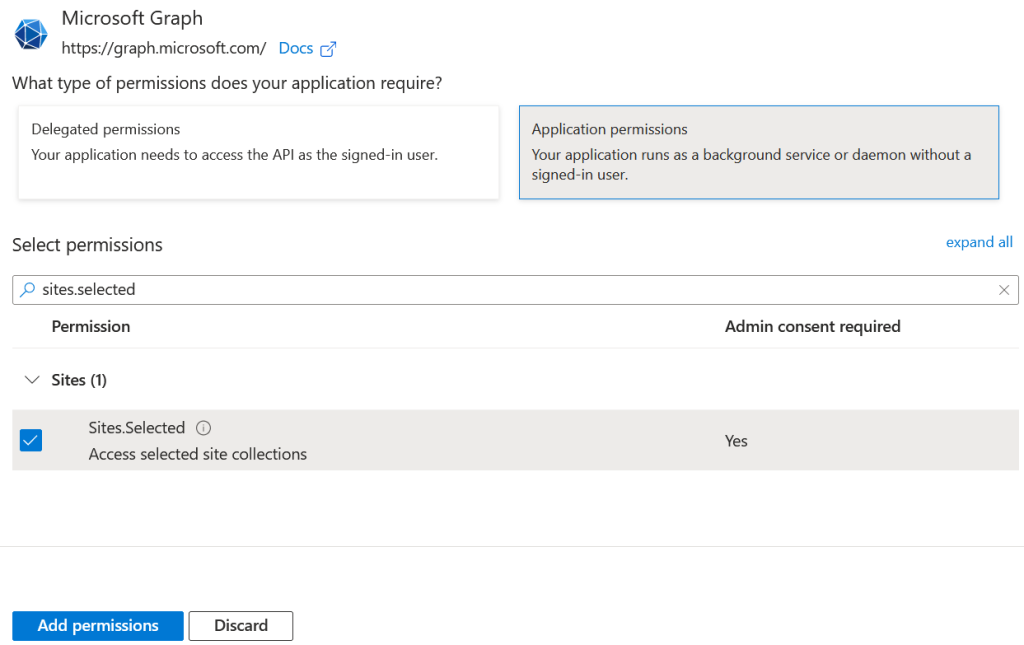
Choose “Application permissions” (not delegated) and find the permission Sites.Selected. Tick it and click “Add permissions.” (If you need access to all sites you could choose Sites.ReadWrite.All instead but this level of access is usually excessive).
Click “Grant admin consent” followed by “Yes” to allow access to the selected site – and now it’s time to actually select the site we want to grant access to.
Unfortunately there isn’t a handy GUI method of choosing which sites the application has access to – this must be done through GraphAPI itself. I find the easiest way is with Graph Explorer. Browse to it and click the “Sign In” icon in the top right. Sign in with an account which has enough access to assign permissions – probably the same account you used to log in to Entra ID.
In the Graph Explorer request bar, enter the following then click “Run query”:
https://graph.microsoft.com/v1.0/sites?search=*You should get a JSON formatted response in the Response Preview pane at the bottom of the screen. Look for the site that you want to grant access to and copy the ID value in its entirety.
Change the address in the Graph Explorer request bar to the following, substituting “ID” for the string you previously copied
https://graph.microsoft.com/v1.0/sites/ID/permissionsNext to the request bar, change GET to POST.
Click the “Modify permissions” tab. You may need to consent to Sites.FullControl.All so that GraphAPI can make the permissions change.

Finally, immediately underneath POST select the “Request body” tab and enter the following. Be sure to enter your application client ID and application display name from when you created your application in Entra ID.
{
  "roles": ["write"],
  "grantedToIdentities": [{
    "application": {
      "id": "application's client ID",
      "displayName": "application's display name"
    }
  }]
}
You should have something like the below. Click “Run query” to add permissions for the site to your application.
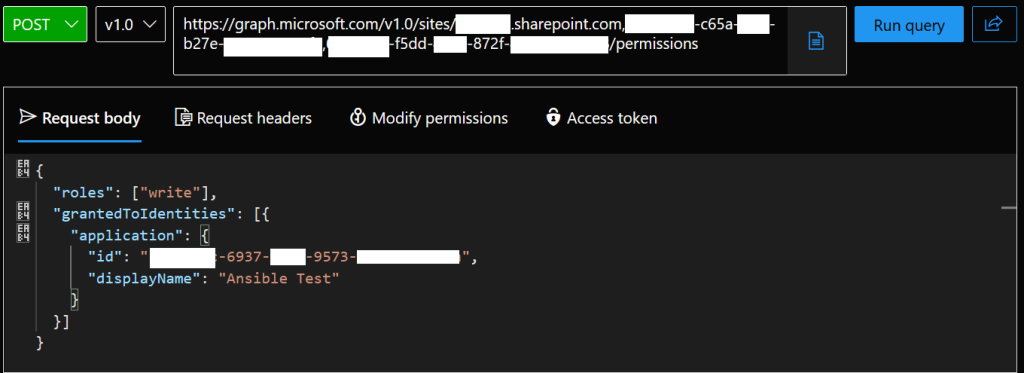
If you receive a Created 201 response code and your application ID and name show in the response previous then it has worked.
If you’d like to test the access, you can use the following cURL commands:
curl -X POST -d "grant_type=client_credentials&client_id=YOUR-CLIENT-ID&client_secret=YOUR-CLIENT-SECRETscope=https://graph.microsoft.com/.default" https://login.microsoftonline.com/YOUR-TENANT-ID/oauth2/v2.0/tokenMake a copy of the access token – it’ll be quite long – and then use the following command to query the SharePoint site
curl https://graph.microsoft.com/v1.0/sites/YOUR-SHAREPOINT-SITE-ID -H "Authorization: Bearer YOUR-ACCESS-TOKEN"If that works, you’ll receive some JSON formatted info about your SharePoint site.
Now all that’s needed is to put everything into a playbook.
---
- name: Upload a file to SharePoint Online
  gather_facts: no
  hosts: localhost

  vars:
    tenant_id: "YOUR TENANT ID"
    client_id: "YOUR APP CLIENT ID"
    client_secret: "YOUR APP CLIENT SECRET"
    site_id: "YOUR SHAREPOINT SITE ID"
    filename: "FILE TO UPLOAD"

  tasks:
  - name: Login to O365
    uri:
      url: "https://login.microsoft.com/{{ tenant_id }}/oauth2/v2.0/token"
      validate_certs: true
      method: POST
      body:
        grant_type: "client_credentials"
        client_id: "{{ client_id }}"
        client_secret: "{{ client_secret }}"
        scope: "https://graph.microsoft.com/.default"
      body_format: form-urlencoded
    register: o365_login

  - name: Get drives
    uri:
      url: "https://graph.microsoft.com/v1.0/sites/{{ site_id }}/drives"
      validate_certs: true
      method: GET
      headers:
        Authorization: "Bearer {{ o365_login.json.access_token }}"
    register: get_drives

  - name: Put file
    shell: 'curl -X "PUT" "https://graph.microsoft.com/v1.0/sites/{{ site_id }}/drives/{{ get_drives.json.value[0].id }}/items/root:/{{ filename }}:/content" -H "Authorization: Bearer {{ o365_login.json.access_token }}" --data-binary @{{ filename }}'
Breaking this down, what the playbook is doing is logging in to O365 with the client ID and secret which will return an access token. It’s then querying the SharePoint site for document libraries (drives). Finally it’s using the local shell and the cURL command to upload the file to the document library root.
That’s all there is to it!
Leave a Reply